This page contains even more topics that are not explicitly part of the lessons.
Bit manipulation
Manipulating individual bits in registers is important in microcontroller programming. A detailed discussion of bitwise operators is presented here:
HD44780 based LCD
In lesson 6 you have seen how to interface an I2C-based LCD to the STM32F05x. If you rather use a 14/10-bit HD44780 interface, then check out the following example project. It implements a HD44780 driver on top of the STM standard peripheral driver library.
STM32F05x HD44780 example code
LIS302D accelerometer
An other I2C example is provided for the LIS302D accelerometer. The example shows how to setup the hardware and howto read and write from the internal registers. It uses the standard peripheral driver library, but as a reference, in comments the CMSIS implementation is shown.
STM32F05x LIS302D example code
Assembly programming
Some projects require parts of it to be written in assembly. This example shows how this can be done in Keil uVision in two ways. The first is how to write external functions in a *.s file and shows how parameters are passed. The second one shows how to use inline assembly and how C-variables can be referenced.
Both example programs run on the STM32F0Discovery board. For debugging the simulator is enabled by default.
74HC595 drivers
One way to expand the I/O’s of a project is using a serial in and parallel out shift register like the 74HC595. This example project shows two targets that implement a driver for the 74HC595. The first target implements the driver with toggling GPIO pins, often called ‘bit-banging’. The second target implements the driver using the SPI interface. The beauty of this example is that the main routine remains the same, because both drivers implement the same Application Programming Interface (API)!
STM32F05x 74HC595 example code
Custom Hardware
This lesson gives an example where the STM32F051R8T6 microcontroller is used on a custom PCB and how it can be programmed using the SWD interface which is available on the STM32F0-Discovery board.
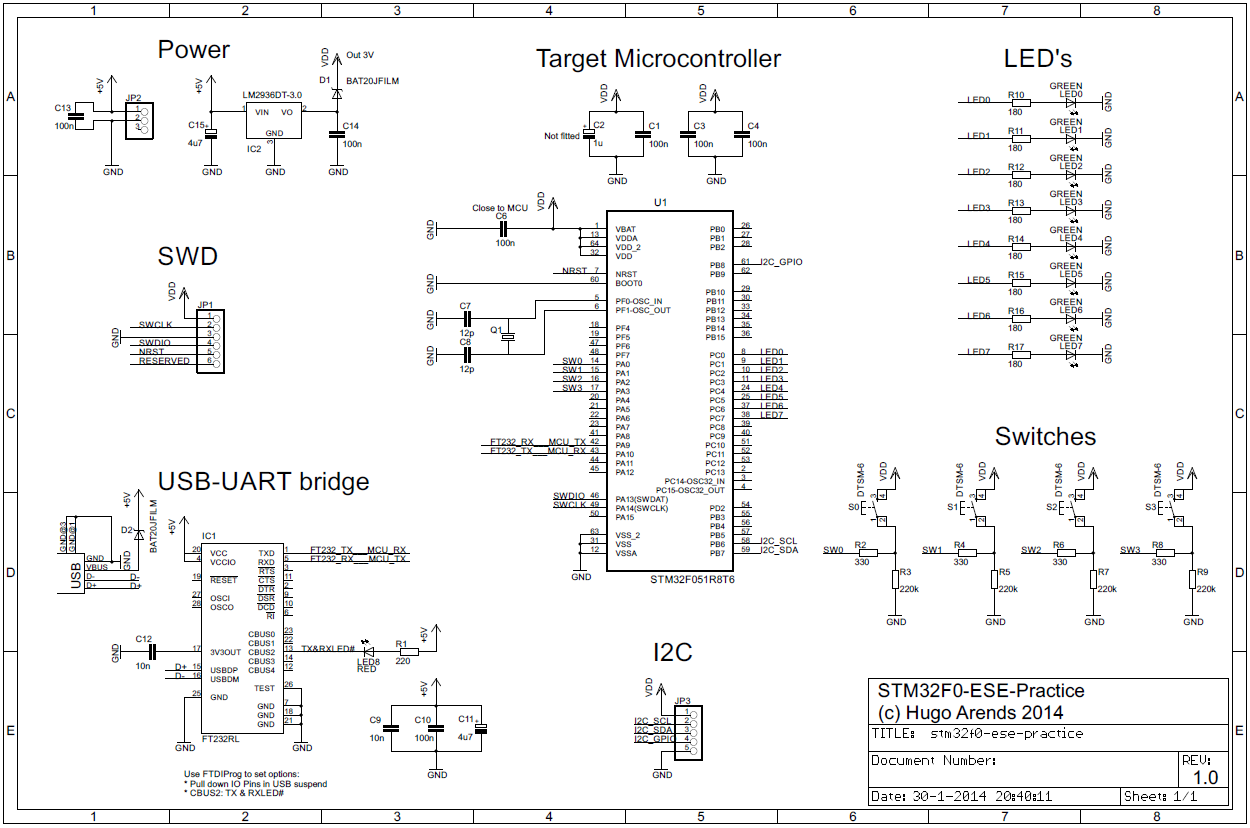
STM32F05x custom hardware lesson
STM32F05x custom hardware example code
Using the High Speed Internal (HSI) 8 MHz oscillator
The STM32F05x microcontroller has three clock sources:
– High Speed Internal (HSI) 8 MHz RC oscillator clock
– High Speed External (HSE) oscillator clock
– Phase-Locked Loop (PLL) clock
The STM32F0-Discovery board firmware examples all use an 8 MHz HSE clock as an input for the PLL to get the microcontroller to clock at 48 MHz. This setup is done in the file ‘system_stm32f0xx.c’.
This example has an updated version of this file so it sets up the HSI as an input for the PLL and still clock the microcontroller at 48 MHz. Care must be taken however, because the exact internal RC oscillator frequency varies depending on variations in temperature and operating voltage. This new file has been generated with the Clock Configuration Tool for STM32F0xx Microcontrollers.
Starting a new project
All lessons provide an example project for μVision. This lesson describes in a nutshell how to start a new project in μVision.
Tips for debugging
When you try to watch the value of a variable during a debug session, you might see the following message instead of it’s actual value: <out of scope>
This most likely means that this variable has been optimized out by the compiler and is in fact not in scope of the debugger (see this link for detailed information about optimization levels and debugging in Keil uVision).
There are several things you can do:
– lower the optimization level.
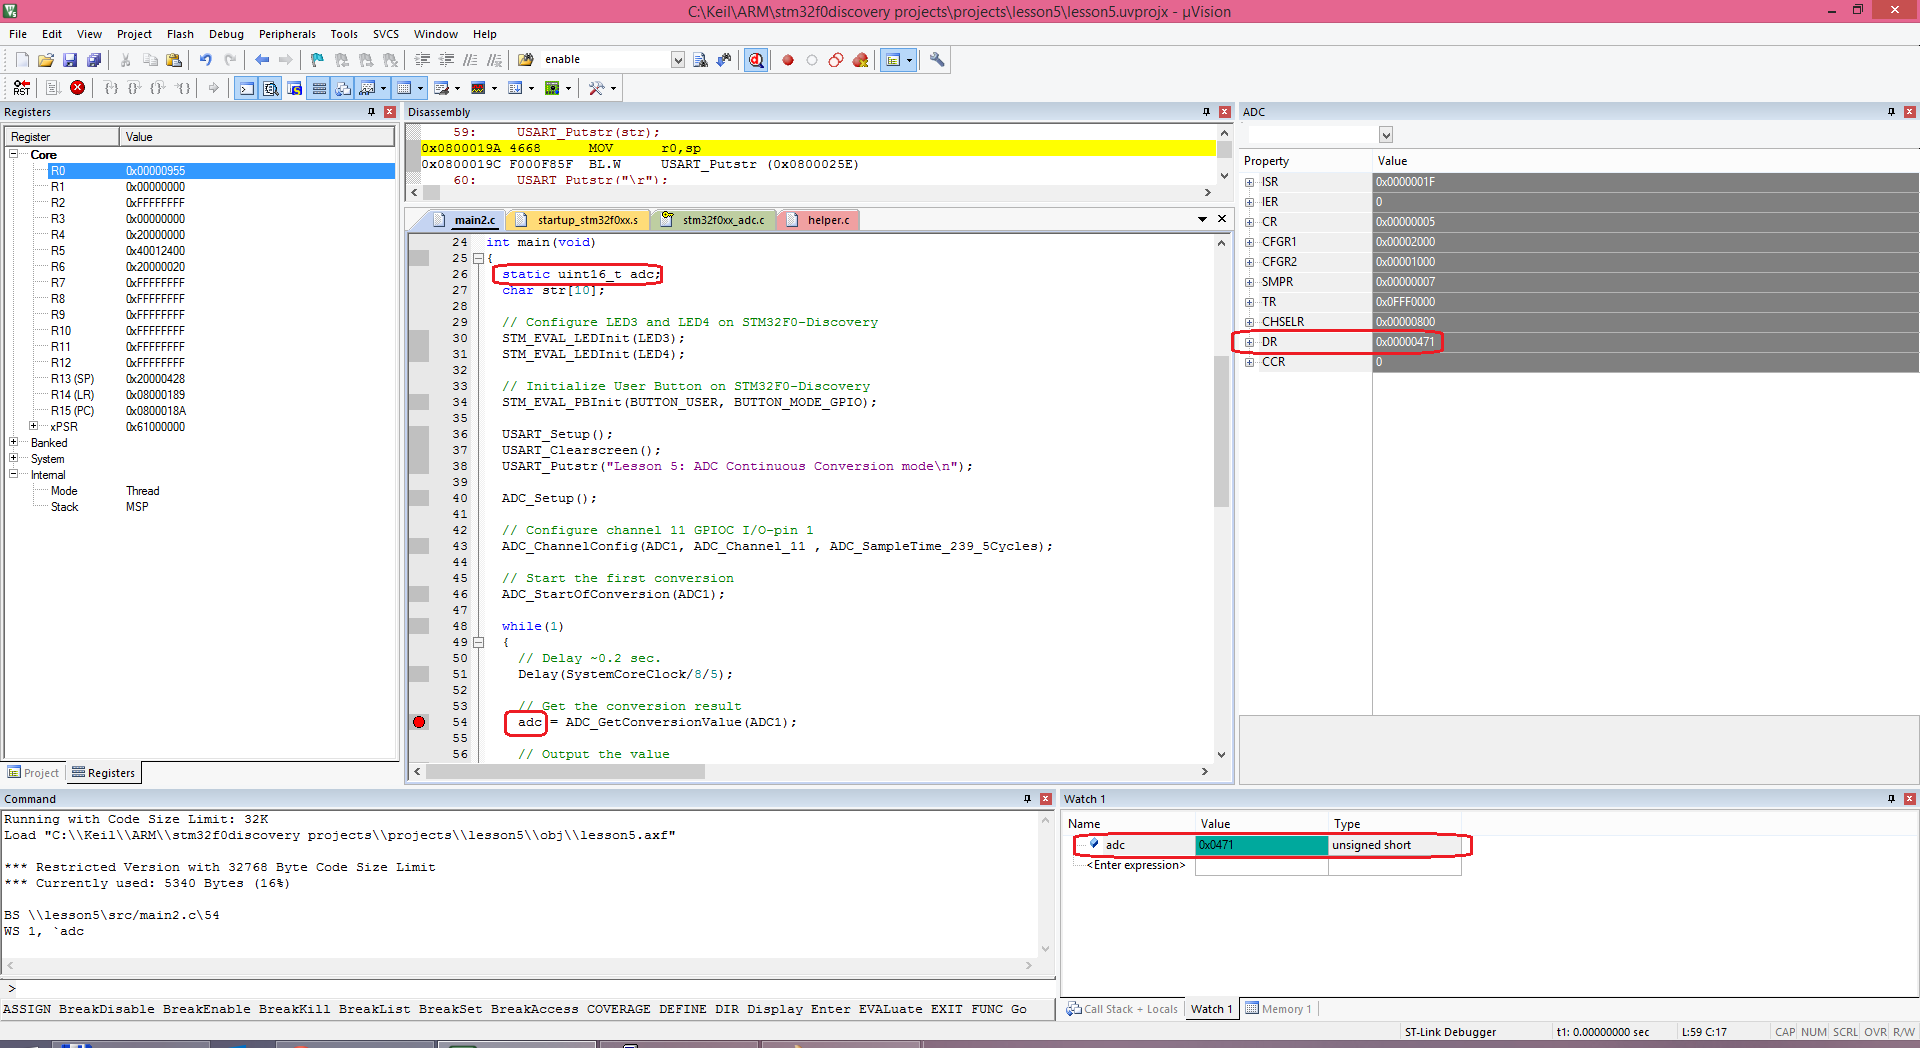
– declare the variable you would like to watch static.
In the following example, the variable has been declared static. When you watch this variable in a ‘Watch window’, it’s value is updated live during runtime.
BTW. Did you know you can also see live the values of all registers in the System Viewer Windows?
Happy debugging 🙂
One more debugging tip. Did you know the STM32F0 microcontroller features four breakpoints and two watchpoints? When you set more in uVision unexpected behavior (like unable to step through the source code) might be experienced. So be sure to not use more break- and watchpoints then supported by the microcontroller.